Are you tired of struggling to clean the inside of your cans? Well, worry no more! In this comprehensive guide, we will be discussing various methods to clean the inside of cans effectively. Whether you’re dealing with rust, stains, or just want to keep your cans in top condition, we’ve got you covered. We’ll go over different cleaning solutions, tools, and techniques that will make the process a breeze. So, grab a can opener and let’s get started on making your cans shine like new!
Why is it important to clean the inside of cans?
Health benefits
Cleaning the inside of cans is important for various reasons, but one of the most significant is the health benefits it provides. The can itself may be clean, but the inside of the can may contain residual chemicals or bacteria that can pose a risk to your health. Therefore, it is crucial to clean the inside of cans before using them.
Reducing the risk of foodborne illnesses
One of the primary health benefits of cleaning the inside of cans is reducing the risk of foodborne illnesses. Bacteria such as E. coli and Salmonella can thrive in the moist environment inside cans, especially if the can has been left open or not cleaned properly. By cleaning the inside of the can, you can eliminate any bacteria or other harmful microorganisms that may be present, reducing the risk of foodborne illnesses.
Eliminating chemical residues
Another health benefit of cleaning the inside of cans is eliminating chemical residues. Cans are often coated with a layer of food-grade plastic to prevent rust and corrosion, but this layer can sometimes contain harmful chemicals that can leach into the food inside the can. By cleaning the inside of the can, you can remove any chemical residues that may be present, ensuring that the food you eat is safe and free from harmful chemicals.
Preventing metal contamination
Finally, cleaning the inside of cans can help prevent metal contamination. Over time, the metal used to make cans can corrode and leach into the food inside the can. This can pose a risk to your health, as the metal can be harmful if consumed in large quantities. By cleaning the inside of the can, you can remove any metal contamination that may be present, ensuring that the food you eat is safe and free from harmful metals.
In conclusion, cleaning the inside of cans is essential for maintaining good health. By eliminating bacteria, chemical residues, and metal contamination, you can reduce the risk of foodborne illnesses and ensure that the food you eat is safe and healthy.
Environmental impact
The environmental impact of not cleaning the inside of cans should not be overlooked. The buildup of residue on the inside of cans can lead to a buildup of bacteria and other microorganisms, which can have negative effects on the environment. Here are some ways in which the environmental impact of dirty cans can be harmful:
- Water pollution: When dirty cans are discarded, the residue and bacteria inside them can seep into the soil and eventually make their way into the water supply. This can lead to the growth of harmful algae and other microorganisms, which can cause water pollution and make it unsafe for consumption.
- Air pollution: When dirty cans are incinerated, the residue and bacteria inside them can release harmful chemicals into the air. These chemicals can contribute to air pollution and can be harmful to human health.
- Soil pollution: When dirty cans are buried in the soil, the residue and bacteria inside them can leach into the soil and contaminate it. This can lead to soil pollution and can make it difficult for plants to grow.
Therefore, it is important to clean the inside of cans to prevent these environmental impacts. By doing so, we can help to keep our environment clean and safe for future generations.
Quality of stored items
Cleaning the inside of cans is crucial to ensure the quality of the items stored inside them. When cans are not cleaned properly, residual food or drink particles can remain inside, leading to contamination and spoilage of subsequent stored items. This can cause a variety of problems, including unpleasant odors, flavors, and textures in the stored items. Additionally, the buildup of residue inside cans can lead to the growth of bacteria and other microorganisms, which can further compromise the quality and safety of the stored items. To prevent these issues, it is important to thoroughly clean the inside of cans before storing new items.
Tools and materials needed for cleaning cans
Can opener
A can opener is a necessary tool for cleaning the inside of cans. It is designed to cut through the top of the can and create an opening for cleaning. There are several types of can openers available, including manual and electric models.
Manual Can Opener
A manual can opener is a simple tool that can be used to open cans by hand. It consists of a handle and a cutting wheel that rotates around the edge of the can to cut it open. Manual can openers are easy to use and require no electricity or batteries.
Electric Can Opener
An electric can opener is a powered tool that can open cans quickly and easily. It works by holding the can in place and using a spinning blade to cut it open. Electric can openers are fast and convenient, but they require electricity to operate.
Key features to consider when choosing a can opener
- Ease of use: The can opener should be easy to use and require minimal effort.
- Durability: The can opener should be made from high-quality materials that can withstand regular use.
- Safety: The can opener should have safety features to prevent accidental injuries.
- Compatibility: The can opener should be compatible with a variety of can sizes and types.
Overall, a can opener is an essential tool for cleaning the inside of cans. Whether you choose a manual or electric model, be sure to choose a durable and safe option that meets your needs.
Rubber gloves
When it comes to cleaning the inside of cans, rubber gloves are an essential tool to have on hand. Here’s why:
- Protection against harsh chemicals: Cleaning solutions used to clean cans can be harsh and can cause skin irritation or allergic reactions. Rubber gloves provide a protective barrier between your skin and the cleaning solutions, keeping your hands safe and free from harm.
- Easy to use: Rubber gloves are easy to put on and take off, making them a convenient option for cleaning the inside of cans. Simply put on a pair of gloves, and you’re ready to start cleaning.
- Improved grip: Cleaning the inside of cans can be messy and require a firm grip on the cans to prevent them from slipping. Rubber gloves provide a secure grip on the cans, making it easier to clean them thoroughly.
- Sanitary: Cleaning the inside of cans involves coming into contact with potential bacteria and other microorganisms. Rubber gloves act as a barrier, preventing any potential contaminants from coming into contact with your skin.
In summary, rubber gloves are an essential tool for cleaning the inside of cans. They provide protection against harsh chemicals, are easy to use, improve grip, and act as a sanitary barrier between your skin and potential contaminants.
Vinegar
Vinegar is a popular and effective cleaning agent that can be used to clean the inside of cans. It is a mild acid that can dissolve and remove stubborn stains, odors, and residues. White vinegar is the most commonly used type of vinegar for cleaning purposes, but apple cider vinegar and other types of vinegar can also be used.
Here are some tips on how to use vinegar to clean the inside of cans:
- Mix equal parts of water and vinegar in a spray bottle.
- Shake the bottle well and spray the mixture inside the can, making sure to cover all surfaces.
- Let the mixture sit for a few minutes, then use a soft cloth or sponge to scrub the inside of the can.
- Rinse the can thoroughly with clean water and dry it with a clean cloth.
It is important to note that vinegar can corrode metal over time, so it should not be left on the can for too long. It is also important to use a non-abrasive cleaning agent to avoid scratching the surface of the can.
Vinegar is a safe and natural cleaning agent that is gentle on the environment and does not leave harmful chemicals behind. It is also a cost-effective and readily available cleaning solution that can be used for a variety of cleaning tasks around the home.
Baking soda
Baking soda is a versatile and natural cleaning agent that can be used to clean the inside of cans. It is a mild abrasive that can dissolve stubborn stains and odors, making it an ideal choice for cleaning food and beverage containers.
To use baking soda to clean the inside of a can, follow these steps:
- Pour a small amount of baking soda into the can. The amount will depend on the size of the can and the amount of residue or stains that need to be removed. A good rule of thumb is to use about a tablespoon of baking soda for each can.
- Add a small amount of water to the baking soda. The water will help the baking soda dissolve and create a paste that can be more easily applied to the inside of the can.
- Use a clean sponge or cloth to apply the paste to the inside of the can. Be sure to cover all surfaces, including the bottom and sides.
- Allow the paste to sit on the inside of the can for several minutes. This will give the baking soda time to dissolve any stubborn stains or odors.
- Use a clean sponge or cloth to wipe away the paste and any residue on the inside of the can.
- Rinse the can thoroughly with clean water to remove any remaining baking soda residue.
- Dry the inside of the can with a clean towel or let it air dry.
It is important to note that while baking soda is a safe and natural cleaning agent, it may not be effective at removing all types of stains or odors. In some cases, it may be necessary to use additional cleaning agents or techniques to thoroughly clean the inside of the can.
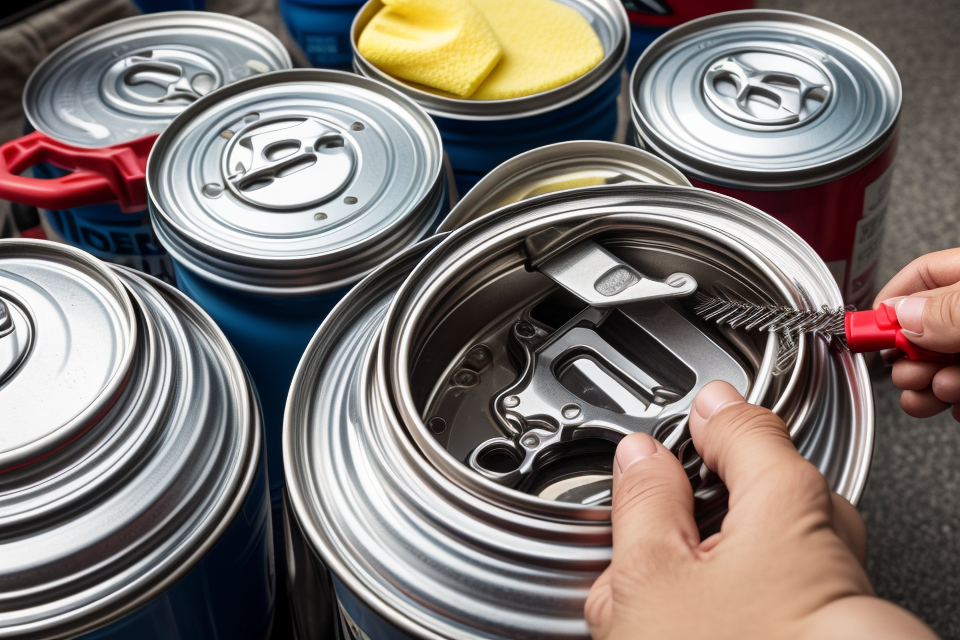
Cloth or sponge
When it comes to cleaning the inside of cans, a cloth or sponge is an essential tool. Here are some key points to keep in mind when using a cloth or sponge to clean cans:
- Use a soft cloth or sponge: A soft cloth or sponge is best for cleaning the inside of cans because it won’t scratch or damage the surface. Avoid using harsh or abrasive materials, such as steel wool or scouring pads, as they can cause permanent damage to the can.
- Soak the cloth or sponge in warm, soapy water: Before using it to clean the inside of the can, soak the cloth or sponge in warm, soapy water. This will help to loosen any debris or residue that may be inside the can, making it easier to remove.
- Scrub gently: When cleaning the inside of the can, scrub gently with the cloth or sponge. Avoid using too much pressure, as this can cause scratches or dents in the surface of the can.
- Rinse thoroughly: After scrubbing the inside of the can, rinse it thoroughly with clean water to remove any remaining soap or debris.
- Dry the can thoroughly: Once the can is clean, make sure to dry it thoroughly to prevent any water spots or residue from forming.
Overall, using a soft cloth or sponge is a safe and effective way to clean the inside of cans. By following these simple steps, you can ensure that your cans are clean and free of any residue or debris.
Mild detergent
When it comes to cleaning the inside of cans, a mild detergent is an essential tool. A mild detergent is a type of cleaning agent that is designed to be gentle on surfaces while still being effective at removing dirt and grime.
One type of mild detergent that is commonly used for cleaning cans is a solution of warm water and a small amount of soap. This type of detergent is easy to make and can be used for a variety of surfaces. To make a solution of warm water and soap, simply add a few drops of soap to a bucket of warm water. Then, use a soft cloth or sponge to gently scrub the inside of the can.
Another option for a mild detergent is a specialized can cleaner. These cleaners are specifically designed to be gentle on the inside of cans and are often used in commercial settings. They typically come in a spray bottle and can be applied directly to the inside of the can. After applying the cleaner, simply wipe the inside of the can with a soft cloth or sponge.
Regardless of which type of mild detergent you choose, it is important to use it sparingly. Applying too much detergent can lead to residue and may damage the surface of the can. It is also important to rinse the inside of the can thoroughly with clean water after cleaning to remove any remaining detergent.
Step-by-step guide to cleaning the inside of cans
Step 1: Remove the labels
Removing the labels from the inside of cans is the first step in cleaning them. There are several methods that can be used to remove labels, including:
- Boiling water: Fill a pot with water and bring it to a boil. Place the cans in the pot and let them sit in the boiling water for a few minutes. The heat from the water should cause the labels to peel off easily.
- Freezing: Place the cans in the freezer for a few hours. The cold temperature should cause the labels to become brittle and easy to remove.
- Using a label remover: There are products available that are specifically designed to remove labels from cans. These products typically contain harsh chemicals that will dissolve the adhesive on the label, making it easier to remove.
It is important to be careful when removing labels, as some of the adhesive may remain on the can even after the label has been removed. To ensure that all of the adhesive is removed, use a clean cloth or sponge to wipe down the cans after the labels have been removed.
Step 2: Scrub the inside of the can with vinegar and baking soda
When it comes to cleaning the inside of cans, step 2 involves scrubbing the interior with a mixture of vinegar and baking soda. This combination works well for removing any residual food particles or odors that may have been left behind after step 1. Here’s how to do it:
Preparing the mixture
First, you’ll need to prepare the cleaning mixture. In a small bowl, combine equal parts vinegar and baking soda. The vinegar helps to break down the food particles, while the baking soda acts as an abrasive to scrub them away. You can adjust the amount of each ingredient depending on the level of cleaning required.
Applying the mixture
Next, you’ll need to apply the mixture to the inside of the can. Use a non-metal sponge or spray bottle to apply the mixture directly to the surface of the can. Be sure to cover all areas, including the corners and edges.
Scrubbing the mixture
Once the mixture has been applied, use a non-metal sponge or non-abrasive sponge to scrub the inside of the can. The baking soda will act as an abrasive, helping to remove any stubborn food particles or stains. You may need to use a bit of elbow grease to get the mixture to work its way into the corners and edges of the can.
Rinsing the can
After scrubbing, rinse the can thoroughly with water to remove any remaining vinegar and baking soda. It’s important to make sure that the can is completely clean before moving on to the next step in the cleaning process.
Overall, using a mixture of vinegar and baking soda is an effective way to scrub the inside of cans and remove any lingering food particles or odors. Just be sure to follow the steps carefully and rinse the can thoroughly to ensure a complete clean.
Step 3: Rinse the can with water
Rinsing the can with water is an essential step in cleaning the inside of cans. It helps to remove any remaining debris or residue from the can, ensuring that it is thoroughly clean and free from any impurities.
Here are the steps to follow when rinsing the can with water:
- Fill a clean sink or container with warm water. The water should be warm, but not hot, as this can cause damage to the can.
- Immerse the can in the water, ensuring that it is completely submerged. Allow the can to soak for a few minutes, depending on the amount of residue present.
- Use a clean sponge or cloth to gently scrub the inside of the can while it is still submerged in the water. This will help to remove any stubborn residue or debris that may have accumulated on the walls of the can.
- After scrubbing, carefully remove the can from the water and rinse it thoroughly under running water to remove any remaining residue or debris.
- Dry the can thoroughly with a clean cloth or paper towel before proceeding to the next step in the cleaning process.
It is important to use warm water when rinsing the can, as this will help to loosen any residue or debris that may be present. Additionally, it is important to use clean water for rinsing to avoid any contamination of the can.
In conclusion, rinsing the can with warm water is an essential step in cleaning the inside of cans. It helps to remove any remaining debris or residue, ensuring that the can is thoroughly clean and free from any impurities. By following the steps outlined above, you can effectively rinse the can with water and prepare it for the next step in the cleaning process.
Step 4: Dry the can with a cloth or sponge
After rinsing the inside of the can with water, it is important to dry it thoroughly to prevent any lingering moisture from causing rust or other damage. The best way to do this is to use a clean cloth or sponge to wipe away any excess water.
Here are some tips for drying the inside of a can:
- Use a soft cloth or sponge to avoid scratching the surface of the can.
- Gently squeeze out any excess water from the cloth or sponge before wiping down the inside of the can.
- Make sure to get into all the nooks and crannies of the can to remove any remaining moisture.
- Use a dry cloth or sponge to wipe down the inside of the can, making sure to remove any excess moisture.
- If the can has a lid, make sure to dry the inside of the lid as well.
By following these steps, you can ensure that your can is completely dry and free from moisture, which will help prevent rust and other types of damage.
Step 5: Dispose of the cleaning materials properly
After you have successfully cleaned the inside of the cans, it is important to dispose of the cleaning materials properly. Improper disposal of cleaning materials can be harmful to the environment and may cause damage to the surrounding area. Here are some tips on how to dispose of the cleaning materials properly:
- Always read the label: Before disposing of any cleaning materials, make sure to read the label and follow the instructions carefully. Some cleaning materials may be hazardous and require special disposal methods.
- Do not pour cleaning materials down the drain: Pouring cleaning materials down the drain can cause blockages and damage to the plumbing system. Instead, pour the cleaning materials into a sealable container and dispose of them in the trash.
- Do not flush cleaning materials down the toilet: Flushing cleaning materials down the toilet can cause damage to the plumbing system and may be harmful to the environment. Instead, dispose of the cleaning materials in the trash.
- Recycle the cleaning materials: If possible, recycle the cleaning materials to reduce waste and protect the environment. Check with your local recycling center to find out if they accept the cleaning materials you are planning to dispose of.
By following these tips, you can properly dispose of the cleaning materials and help protect the environment.
Tips for maintaining clean cans
Use the right size of can for storage
Choosing the right size of can for storage is an important factor in maintaining clean cans. Different sizes of cans have different capacities, and if you use a can that is too small or too large, it can lead to an increased risk of contamination. Here are some tips to help you choose the right size of can for storage:
- Consider the amount of food or drink you plan to store: If you are storing a large amount of food or drink, then a larger can is recommended. On the other hand, if you are storing a small amount, then a smaller can would be more appropriate.
- Choose a can with a tight-fitting lid: A can with a tight-fitting lid will help to prevent contaminants from entering the can, which can help to keep the contents clean.
- Avoid overfilling the can: Overfilling a can can lead to spillage, which can increase the risk of contamination. Make sure to fill the can to the recommended level to avoid this.
- Consider the type of food or drink you plan to store: Some foods and drinks may require a specific size of can due to their particular characteristics. For example, if you are storing a liquid that needs to be shaken before use, then a can with a narrow opening is recommended.
By following these tips, you can ensure that you are using the right size of can for storage, which can help to maintain the cleanliness of your cans.
Keep cans away from direct sunlight
Prolonged exposure to direct sunlight can cause damage to the interior of cans, leading to the formation of rust and other forms of corrosion. To prevent this from happening, it is important to keep cans away from direct sunlight whenever possible. Here are some tips for storing cans in a way that minimizes their exposure to sunlight:
- Store cans in a cool, dry place: Ideally, cans should be stored in a cool, dry place that is out of direct sunlight. This could be a pantry, cupboard, or other storage area that is shielded from the sun’s rays.
- Use UV-blocking containers: If you need to store cans in a place where they will be exposed to direct sunlight, consider using containers that block UV rays. These containers can help to prevent the formation of rust and other forms of corrosion on the interior of cans.
- Consider using opaque containers: Another option is to use opaque containers to store cans. This can help to prevent light from penetrating the container and damaging the interior of the cans.
By following these tips, you can help to ensure that your cans remain clean and free from damage, even if they are stored in a place where they are exposed to direct sunlight.
Store cans in a cool, dry place
Proper storage of cans is crucial to maintaining their cleanliness. One effective tip is to store cans in a cool, dry place. This can help prevent the growth of bacteria and other microorganisms that can contaminate the contents of the cans.
It is important to note that storing cans in direct sunlight or in areas with high humidity can increase the risk of contamination. Additionally, storing cans in a cool, dry place can help prevent the buildup of moisture inside the cans, which can also lead to the growth of bacteria and other microorganisms.
Furthermore, it is recommended to store cans in a dark place, as exposure to light can cause a chemical reaction called oxidation, which can affect the taste and quality of the contents. Therefore, storing cans in a cool, dry, and dark place can help maintain their cleanliness and preserve the quality of their contents.
Check the contents regularly for spoilage
One of the most important steps in maintaining clean cans is to regularly check the contents for spoilage. It is crucial to do this before consuming the contents to avoid any potential health risks.
There are several signs to look out for when checking the contents of a can. Firstly, if the contents have a strange odor, it may be an indication that they have gone bad. Additionally, if the contents have a different color than usual, it may also be a sign of spoilage.
It is also important to check the texture of the contents. If the contents are slimy or have a different texture than usual, it may be an indication that they have gone bad.
In order to properly check the contents of a can, it is important to first open the can in a well-ventilated area. Once the can is open, carefully inspect the contents for any signs of spoilage. If the contents are spoiled, it is important to discard them immediately to avoid any potential health risks.
In addition to checking the contents regularly, it is also important to properly store the cans to prevent any potential spoilage. Storing the cans in a cool, dry place can help to prevent any potential damage to the contents.
Overall, checking the contents of cans regularly is a crucial step in maintaining clean cans. By following these tips, you can help to ensure that the contents of your cans are safe to consume.
Frequently asked questions about cleaning the inside of cans
Q: Can I use bleach to clean the inside of cans?
Yes, bleach can be an effective method for cleaning the inside of cans. It is important to note that bleach should be used with caution and in well-ventilated areas. When using bleach to clean the inside of cans, it is recommended to use a solution of one cup of bleach per gallon of water. This solution should be poured into the can and allowed to sit for several minutes before rinsing with clean water. It is important to avoid using bleach on aluminum cans, as it can cause discoloration and damage to the surface. Additionally, if the can contains food or other substances, it is important to ensure that the bleach solution does not come into contact with the contents, as it can cause spoilage or other issues.
Q: Is it necessary to clean the inside of cans before storing food items?
When it comes to storing food items, it is important to ensure that the containers used are clean and free from any residual food particles or contaminants. The inside of cans, in particular, can harbor bacteria and other microorganisms that can compromise the safety and quality of the stored food items. Therefore, it is necessary to clean the inside of cans before storing food items to prevent the growth of harmful microorganisms and to maintain the freshness and quality of the stored food.
Q: Can I use any type of can opener to clean the inside of cans?
A: When it comes to cleaning the inside of cans, using the right type of can opener is crucial. Not all can openers are created equal, and some are better suited for this task than others.
The most common type of can opener is the manual can opener, which uses a lever to punch a hole in the top of the can. While this type of opener is sufficient for opening cans, it may not be the best choice for cleaning the inside of cans. The hole that the manual can opener punches is usually too large, which can allow debris and bacteria to enter the can.
On the other hand, electric can openers use a spinning blade to cut through the top of the can. This type of opener is better suited for cleaning the inside of cans because it creates a smaller hole, which minimizes the risk of contamination.
In addition to electric can openers, there are also specialized cleaning tools available that are specifically designed for cleaning the inside of cans. These tools typically use a combination of pressure and a small, precise hole to blast away stubborn residue and debris.
It’s important to note that when using any type of can opener to clean the inside of cans, it’s essential to follow proper hygiene protocols to prevent contamination. This includes washing your hands before and after use, using a clean cloth or brush to apply the cleaner, and thoroughly rinsing the can before use.
Q: Can I reuse cans that have been cleaned?
- Yes, cans that have been cleaned can be reused.
- However, it is important to ensure that the cans are completely clean and free of any residue before reuse.
- This can be achieved by using a combination of manual cleaning methods, such as wiping or scraping the inside of the can, and using specialized cleaning solutions or tools designed for cleaning cans.
- If the cans are not properly cleaned and sanitized, they may retain residual odors, flavors, or other contaminants, which can affect the taste and quality of the food or drink stored in them.
- Therefore, it is essential to take the time to thoroughly clean the inside of the cans before reuse to ensure that they are safe and suitable for storing food or drink.
FAQs
1. What is the best way to clean the inside of a can?
The best way to clean the inside of a can is to use a mixture of warm water and mild dish soap. First, remove the label from the can and rinse it thoroughly with warm water. Then, add a small amount of dish soap to the warm water and use a cloth or sponge to scrub the inside of the can. Be sure to remove all of the soap with clean water and dry the can thoroughly before using it.
2. Can I use vinegar to clean the inside of a can?
Yes, you can use vinegar to clean the inside of a can. Vinegar is a natural cleaning agent that can help to remove stubborn stains and odors. To use vinegar to clean the inside of a can, mix equal parts vinegar and water, then use a cloth or sponge to scrub the inside of the can. Be sure to rinse the can thoroughly with clean water and dry it before using it.
3. How do I remove rust from the inside of a can?
To remove rust from the inside of a can, you can use a mixture of equal parts vinegar and water. First, scrub the rust stains with a cloth or sponge, then apply the vinegar mixture to the affected area and let it sit for a few minutes. Afterward, use a non-abrasive sponge or cloth to scrub the area and remove the rust. Finally, rinse the can thoroughly with clean water and dry it before using it.
4. Is it safe to use harsh chemicals to clean the inside of a can?
No, it is not safe to use harsh chemicals to clean the inside of a can. Harsh chemicals can damage the metal and cause it to corrode more quickly. Additionally, they can leave harmful residues behind that can be harmful if ingested. It is best to use mild cleaning agents like warm water and dish soap or vinegar to clean the inside of a can.
5. How often should I clean the inside of a can?
It is recommended to clean the inside of a can after each use, especially if it has been used to store food or drinks. This will help to prevent the buildup of bacteria and other contaminants. Additionally, if the can has been used to store acidic or highly-flavored foods, it may need to be cleaned more frequently to prevent the buildup of residues.


