Tools are an essential part of our daily lives, whether it’s in the kitchen, workshop, or office. However, keeping them clean and well-maintained is crucial to ensure they last longer and perform efficiently. But how do you properly clean your tools? In this ultimate guide, we’ll show you the best techniques and methods for cleaning different types of tools, so they remain in top condition. Whether you’re a DIY enthusiast or a professional, this guide has got you covered. Let’s get started!
Understanding the Importance of Cleaning Your Tools
The Benefits of Cleaning Your Tools
Maintaining clean and well-maintained tools is crucial for ensuring their longevity and efficiency. By regularly cleaning your tools, you can avoid a buildup of dirt, debris, and grime that can impair their performance and potentially cause damage. In addition to improving the functionality of your tools, cleaning them can also help prevent accidents and injuries, as well as protect against the spread of bacteria and other contaminants. Here are some specific benefits of cleaning your tools:
- Improved Functionality: Over time, tools can become clogged with dirt, dust, and other debris, which can impede their performance. Regular cleaning can help remove these obstructions, allowing your tools to function more smoothly and efficiently.
- Extended Lifespan: Regular cleaning can help prevent damage to your tools, which can extend their lifespan and save you money in the long run. By removing buildup and preventing corrosion, you can help maintain your tools’ integrity and prevent costly repairs or replacements.
- Increased Safety: Dirty tools can be hazardous to use, as they can increase the risk of accidents and injuries. By keeping your tools clean, you can reduce the risk of slips, cuts, and other accidents, helping to ensure a safer work environment.
- Health Benefits: Clean tools can also help prevent the spread of bacteria and other contaminants, which can be particularly important in industries such as food service and healthcare. By regularly cleaning your tools, you can help reduce the risk of illness and promote a healthier work environment.
The Risks of Not Cleaning Your Tools
Not cleaning your tools can lead to a variety of problems that can affect the quality of your work and the longevity of your tools. Here are some of the risks of not cleaning your tools:
- Buildup of dirt and debris: Over time, tools can become covered in dirt, dust, and other debris. This buildup can affect the performance of your tools, making them harder to use and less effective.
- Rust and corrosion: Tools that are not cleaned and maintained can become rusty and corroded, which can damage the tools and make them harder to use.
- Spread of bacteria and germs: Dirty tools can harbor bacteria and germs, which can be harmful to your health. This is especially true for tools that are used in the kitchen or for other food-related tasks.
- Reduced lifespan of tools: Tools that are not properly cleaned and maintained can wear out more quickly, reducing their lifespan and requiring you to replace them more frequently.
- Reduced safety: Dirty tools can be slippery and difficult to handle, which can increase the risk of accidents and injuries.
- Unpleasant odors: Tools that are not cleaned can develop unpleasant odors, which can be unpleasant to work with and can also indicate the presence of bacteria or other germs.
It is important to note that different tools may require different cleaning methods, so it is important to read the manufacturer’s instructions and follow any specific guidelines for your particular tools. By taking the time to properly clean your tools, you can ensure that they are in good working condition and that you are able to produce high-quality work.
Common Cleaning Mistakes to Avoid
Using Inappropriate Cleaning Agents
One of the most common cleaning mistakes is using inappropriate cleaning agents. Using the wrong cleaning agent can cause damage to your tools and reduce their lifespan. It is important to choose the right cleaning agent for the type of tool you are cleaning.
For example, using a solvent-based cleaner on a tool with delicate components can cause damage to the tool’s electronic components. Similarly, using a water-based cleaner on a tool with moving parts can cause the lubricant to break down, leading to corrosion and rusting.
When choosing a cleaning agent, consider the following factors:
- The material the tool is made of
- The type of dirt or grime you need to remove
- The type of moving parts or electronics the tool has
Using the right cleaning agent can not only keep your tools in good condition, but it can also save you money in the long run by extending the lifespan of your tools.
In conclusion, when cleaning your tools, it is important to use the right cleaning agent. Choosing the right cleaning agent depends on the type of tool, the material it is made of, and the type of dirt or grime you need to remove. Using the wrong cleaning agent can cause damage to your tools and reduce their lifespan.
Improper Storage of Cleaning Tools
When it comes to properly cleaning your tools, one common mistake that many people make is improper storage of cleaning tools. Here are some of the most important things to keep in mind when it comes to storing your cleaning tools:
- Store cleaning tools in a dry place: One of the most important things to keep in mind when it comes to storing cleaning tools is to make sure they are stored in a dry place. Moisture can cause rust and corrosion, which can damage your tools over time.
- Store cleaning tools in a safe place: It’s also important to store your cleaning tools in a safe place where they won’t be damaged or get in the way. This means keeping them out of reach of children and pets, and away from heat sources like radiators or stoves.
- Store cleaning tools in a organized manner: A disorganized storage space can lead to misuse and damage of tools. Therefore, it is important to store your cleaning tools in an organized manner, so that you can easily find what you need when you need it.
- Store cleaning tools in their designated place: Each tool should have its designated place in the storage space. This helps in easy access and prevents damage to the tools.
- Avoid overcrowding: Overcrowding the storage space can lead to damage of the tools. Make sure that there is enough space for the tools to be stored properly.
By following these simple tips, you can help ensure that your cleaning tools last longer and perform better over time.
Inadequate Drying Techniques
One of the most common cleaning mistakes is using inadequate drying techniques. When cleaning tools, it is important to ensure that they are completely dry before storing them away. If tools are not completely dry, they may become rusty or develop other types of damage.
Here are some tips for proper drying techniques:
- Allow tools to air dry completely before storing them away.
- Use a clean cloth or paper towel to wipe away any excess moisture.
- Avoid using heat to dry tools, as this can cause damage to certain materials.
- Make sure tools are completely dry before using them, as wet tools can be slippery and difficult to handle.
By following these tips, you can ensure that your tools are properly dried and ready for storage or use.
The Proper Way of Cleaning Different Types of Tools
Metals and Alloys
When it comes to cleaning metals and alloys, there are several methods that can be used to ensure that they are properly cleaned and protected. Here are some of the most effective methods:
- Aluminum: Aluminum is a common metal that is used in a variety of tools, including wrenches and sockets. To clean aluminum tools, use a soft cloth and a mild detergent to wipe away any dirt or debris. You can also use a brush to gently scrub the tool if needed.
- Brass: Brass is another common metal that is used in tools, particularly those that require a high level of corrosion resistance. To clean brass tools, use a soft cloth and a mild detergent to wipe away any dirt or debris. You can also use a brush to gently scrub the tool if needed.
- Copper: Copper is a highly conductive metal that is often used in electrical tools. To clean copper tools, use a soft cloth and a mild detergent to wipe away any dirt or debris. You can also use a brush to gently scrub the tool if needed.
- Stainless Steel: Stainless steel is a highly durable metal that is often used in tools that are exposed to harsh environments. To clean stainless steel tools, use a soft cloth and a mild detergent to wipe away any dirt or debris. You can also use a brush to gently scrub the tool if needed.
- Titanium: Titanium is a highly strong and lightweight metal that is often used in tools that require a high level of strength and durability. To clean titanium tools, use a soft cloth and a mild detergent to wipe away any dirt or debris. You can also use a brush to gently scrub the tool if needed.
Regardless of the type of metal or alloy that your tools are made of, it is important to use a gentle cleaning method to avoid damaging the tools or the metal itself. Always make sure to read the manufacturer’s instructions before attempting to clean any tools, and never use harsh chemicals or abrasive materials that could scratch or damage the surface.
Ceramics and Glass
Cleaning ceramics and glass is a delicate process that requires special attention to avoid damaging the surface. Here are some tips for cleaning different types of ceramics and glass items:
- Glassware: For glassware, use a soft cloth or sponge to wipe away any dirt or stains. Avoid using abrasive sponges or brushes, as they can scratch the surface of the glass. If there are stubborn stains, you can use a mild detergent and warm water to clean the glassware. Make sure to rinse thoroughly with clean water before drying with a soft cloth.
- China and Porcelain: China and porcelain are delicate materials that can be easily damaged if not cleaned properly. Use a soft cloth or sponge to wipe away any dirt or stains. Avoid using abrasive sponges or brushes, as they can scratch the surface of the china or porcelain. If there are stubborn stains, you can use a mild detergent and warm water to clean the china or porcelain. Make sure to rinse thoroughly with clean water before drying with a soft cloth.
- Ceramic Tiles: Ceramic tiles are a popular choice for flooring and walls in many homes. To clean ceramic tiles, use a soft cloth or sponge to wipe away any dirt or stains. Avoid using abrasive sponges or brushes, as they can scratch the surface of the tiles. If there are stubborn stains, you can use a mild detergent and warm water to clean the tiles. Make sure to rinse thoroughly with clean water before drying with a soft cloth.
- Glazed Ceramics: Glazed ceramics, such as kitchenware and decorative items, can be cleaned with a soft cloth or sponge and mild detergent. Avoid using abrasive sponges or brushes, as they can scratch the surface of the glaze. If there are stubborn stains, you can use a soft brush to gently scrub the area before rinsing with clean water and drying with a soft cloth.
Overall, when cleaning ceramics and glass, it’s important to use gentle, non-abrasive methods to avoid damaging the surface. Always start with a mild detergent and warm water, and only use more aggressive cleaning methods if the stains are particularly stubborn. Remember to rinse thoroughly and dry with a soft cloth to prevent water spots and other damage.
Plastics and Composites
Plastics and composites are commonly used materials in a wide range of tools, from handheld devices to heavy machinery. Proper cleaning is essential to maintain the performance and longevity of these tools. Here are some tips on how to clean plastics and composites:
Use the right cleaning solution
Plastics and composites can be cleaned using a variety of cleaning solutions, including mild detergents, alcohol-based solvents, and specialized cleaning agents. It’s important to choose the right cleaning solution for the specific type of plastic or composite material. For example, acetone can be used to clean certain types of plastics, while mild detergents may be better suited for others.
Avoid harsh chemicals
While harsh chemicals may be effective at removing dirt and grime, they can also damage the surface of the plastic or composite material. It’s important to avoid using harsh chemicals, such as bleach or abrasive cleaners, when cleaning plastics and composites.
Avoid using excessive force
Excessive force can cause scratches or other damage to the surface of the plastic or composite material. Avoid using excessive force when cleaning, such as scrubbing too hard or using abrasive cleaning pads.
Dry thoroughly
After cleaning, it’s important to dry the plastic or composite material thoroughly to prevent any water spots or other damage. Use a soft cloth or towel to wipe away any excess moisture.
Inspect for damage
After cleaning, inspect the plastic or composite material for any signs of damage. If there are any scratches or other damage, it may be necessary to repair or replace the tool.
In summary, cleaning plastics and composites requires the right cleaning solution, avoiding harsh chemicals, avoiding excessive force, drying thoroughly, and inspecting for damage. Following these tips can help ensure that your tools remain in good condition and continue to perform at their best.
Electronics and Electrical Components
Proper cleaning of electronics and electrical components is essential to ensure their longevity and optimal performance. Here are some steps to follow:
- Power off and unplug the device before cleaning.
- Use a soft, dry cloth to wipe down the exterior of the device. Avoid using water or any liquid cleaners as they can damage the electronics.
- Dust can accumulate in the crevices of the device, so use a soft brush to gently remove it.
- For more stubborn dirt and grime, use a soft cloth moistened with rubbing alcohol. Be sure to test it on a small, inconspicuous area first to ensure it won’t damage the device.
- If necessary, use a mild soap and water solution to clean the device. Be sure to rinse thoroughly and dry with a soft cloth.
- To clean the electrical components inside the device, use a can of compressed air to blow out any dust or debris. Be sure to hold the can upright and away from your face to avoid inhaling the dust.
- For more stubborn grime, use a soft cloth moistened with rubbing alcohol. Again, be sure to test it on a small, inconspicuous area first to ensure it won’t damage the device.
- Once the device is clean, inspect it for any signs of damage and replace any damaged components as necessary.
By following these steps, you can properly clean your electronics and electrical components and ensure they continue to function at their best.
Tips for a Thorough and Effective Cleaning Process
Preparing Your Workspace
- Remove clutter: A cluttered workspace can make it difficult to properly clean and maintain your tools. Take the time to remove any unnecessary items from your workspace before beginning the cleaning process.
- Set up a cleaning station: Designate a specific area in your workspace for cleaning tools. This can help prevent damage to your tools and make the cleaning process more efficient.
- Gather cleaning supplies: Make sure you have all the necessary cleaning supplies on hand before starting the cleaning process. This can include things like cleaning solutions, brushes, and rags.
- Protect your workspace: Cover your work surface with a drop cloth or other protective material to prevent damage to your tools and workspace.
- Put tools away properly: After cleaning, make sure to put your tools away in their designated places. This will help keep your workspace organized and prevent damage to your tools.
Identifying and Removing Contaminants
Proper cleaning of tools is crucial to ensure their longevity and efficiency. The first step in cleaning your tools is identifying and removing contaminants. This involves inspecting the tools for dirt, grease, and debris, and removing them using the appropriate cleaning methods.
There are several types of contaminants that can accumulate on tools, including:
- Dirt and debris: These can be removed using a brush or cloth.
- Grease and oil: These can be removed using a solvent or degreaser.
- Rust and corrosion: These can be removed using a rust remover or steel wool.
It is important to use the right cleaning method for each type of contaminant to ensure that they are completely removed. For example, using a solvent or degreaser to remove grease and oil can damage the tool’s surface, while using a brush or cloth to remove rust and corrosion can scratch the surface.
In addition to removing contaminants, it is also important to inspect the tools for any damage or wear and tear. This can help prevent further damage or malfunctioning of the tools.
Overall, identifying and removing contaminants is a crucial step in the cleaning process, and using the appropriate cleaning methods can help extend the life of your tools and ensure they are always ready for use.
Cleaning and Drying Techniques
Proper cleaning and drying techniques are essential for maintaining the longevity and functionality of your tools. Follow these guidelines to ensure that your tools are always in top condition:
1. Use the Right Cleaning Agents
Choose cleaning agents that are safe for your tools and do not contain harsh chemicals or abrasive materials. Common cleaning agents include mild soap, rubbing alcohol, and white vinegar. Be sure to test the cleaning agent on a small, inconspicuous area of the tool before using it on the entire surface.
2. Clean in the Right Order
Clean the tool in the following order to avoid damaging any components:
- Remove any visible debris or dirt from the tool with a brush or cloth.
- Use a soft cloth or sponge to apply the cleaning agent to the tool.
- Use a brush or non-abrasive sponge to scrub the tool, paying close attention to any crevices or hard-to-reach areas.
- Rinse the tool thoroughly with water.
- Dry the tool with a soft cloth or paper towels.
3. Use the Right Tools for Drying
Use tools that are specifically designed for drying your tools, such as soft cloths or paper towels. Avoid using towels or rags that may contain fibers that can become lodged in the tool’s crevices and cause damage.
4. Dry the Tool Completely
Ensure that the tool is completely dry before storing it. If the tool is not completely dry, moisture may become trapped in the tool’s crevices, leading to rust and corrosion. To speed up the drying process, you can use a hair dryer or place the tool in a warm, well-ventilated area.
5. Inspect the Tool for Damage
After the tool has been cleaned and dried, inspect it for any signs of damage. If you notice any scratches, dents, or other damage, take appropriate measures to repair the tool before storing it.
By following these cleaning and drying techniques, you can ensure that your tools are always in good condition and ready for use.
Proper Storage of Cleaning Tools
When it comes to cleaning tools, proper storage is just as important as the cleaning process itself. Here are some tips for storing your cleaning tools in a way that keeps them in good condition and ready for their next use:
- Keep tools organized: Store your cleaning tools in a designated area or cabinet, and keep them organized by type and use. This will make it easier to find the tools you need when you’re ready to clean, and it will help prevent damage to the tools.
- Use appropriate storage containers: Use containers that are specifically designed for cleaning tools, such as toolboxes or trays. These containers will help protect your tools from damage and keep them organized.
- Store tools in a dry place: Make sure your cleaning tools are stored in a dry place, away from moisture and humidity. Moisture can damage tools and cause rust and corrosion, so it’s important to keep them dry and protected.
- Avoid stacking tools: Avoid stacking tools on top of each other, as this can cause damage to the handles or other delicate parts of the tools. Instead, store tools horizontally or vertically in their designated storage containers.
- Keep tools sharp: If you have tools that require sharpening, make sure they are stored in a way that keeps them sharp. A dull tool can be more difficult to use and may not clean as effectively, so it’s important to keep your tools sharp and ready for use.
By following these tips for proper storage of cleaning tools, you can help ensure that your tools are in good condition and ready for their next use. Proper storage will also help extend the life of your tools and save you time and money in the long run.
Frequently Asked Questions about Cleaning Tools
What is the best way to clean my tools?
When it comes to cleaning your tools, there are a few different methods you can use, depending on the type of tool and the material it’s made of. Here are some general guidelines for cleaning different types of tools:
- Metal tools: For metal tools, the best way to clean them is to use a soft brush or cloth to remove any dirt or debris. You can also use a mild soap and water solution to scrub away any stubborn grime. Be sure to dry the tools thoroughly before storing them to prevent rust and corrosion.
- Wooden tools: Wooden tools should be cleaned with a soft, dry cloth. Avoid using water or any other liquid, as this can damage the wood and cause it to crack or warp. If there is dirt or grime on the tool, gently wipe it away with the cloth.
- Plastic tools: Plastic tools can be cleaned with a soft brush or cloth. Avoid using any sharp objects, as these can scratch the plastic. You can also use a mild soap and water solution to clean the tools, but be sure to rinse them thoroughly and dry them completely before storing them.
- Electronic tools: Electronic tools, such as drills and saws, should be cleaned with a soft, dry cloth. Avoid using any liquids or chemicals, as these can damage the electronic components. If there is dirt or debris in the tool, use a brush to gently remove it.
Overall, the key to properly cleaning your tools is to use gentle, non-abrasive methods that won’t damage the tool or its components. By following these guidelines, you can help extend the life of your tools and keep them in good condition for years to come.
Can I use soap and water to clean my tools?
When it comes to cleaning your tools, it’s important to use the right methods to ensure they remain in good condition and continue to function properly. One common question people have is whether they can use soap and water to clean their tools.
While soap and water may seem like a simple solution, it’s not always the best option. Depending on the type of tool and the material it’s made of, using soap and water could potentially damage it. For example, if your tool is made of metal, soap and water could cause rusting or corrosion.
In addition, soap and water may not be effective at removing all types of dirt and debris. For tools that have been used in particularly dirty or dusty environments, it’s important to use a more specialized cleaning solution that can penetrate deeper and remove tough grime.
So, what’s the best way to clean your tools? It depends on the type of tool and the material it’s made of. Some tools may require a simple wipe down with a damp cloth, while others may need to be disassembled and cleaned with specialized solutions.
It’s also important to make sure you’re using the right cleaning methods for the specific type of tool you’re working with. For example, some tools may require specific cleaning agents or procedures to ensure they’re thoroughly cleaned and sanitized.
In general, it’s always a good idea to consult the manufacturer’s instructions for any tools you’re working with. They will likely have specific recommendations for cleaning and maintaining their products.
Overall, while soap and water may be suitable for some tools, it’s important to be aware of the potential risks and limitations of this method. By using the right cleaning methods for your specific tools, you can help ensure they remain in good condition and continue to function properly.
How do I clean tools made of different materials?
Cleaning tools made of different materials requires a slightly different approach for each type of material. Here are some tips for cleaning tools made of wood, metal, and plastic:
Wooden Tools
Wooden tools should be cleaned gently to avoid damaging the wood. Use a soft, dry cloth to wipe away any debris or residue. If necessary, you can use a small amount of rubbing alcohol on a cloth to remove stubborn stains. Be sure to clean the tool thoroughly and dry it completely to prevent cracking or warping.
Metal Tools
Metal tools can be cleaned using a variety of methods, depending on the type of metal and the level of residue. For light residue, a soft cloth or brush can be used to gently remove debris. For heavier residue, a mixture of warm water and mild soap can be used to clean the tool. Be sure to rinse the tool thoroughly and dry it completely to prevent rusting.
Plastic Tools
Plastic tools can be cleaned using a soft cloth or brush to remove any debris or residue. Avoid using harsh chemicals or abrasive cleaners, as these can damage the plastic. If necessary, a small amount of rubbing alcohol can be used to remove stubborn stains. Be sure to clean the tool thoroughly and dry it completely to prevent any buildup of moisture.
Overall, it’s important to be gentle when cleaning tools made of different materials to avoid damaging them. By following these tips, you can ensure that your tools are clean and ready to use for your next project.
What are the consequences of not cleaning my tools properly?
When it comes to cleaning your tools, neglecting this essential task can have serious consequences. Failure to properly clean your tools can lead to a buildup of dirt, grime, and debris, which can cause damage to the tools and affect their performance. In addition, dirty tools can harbor bacteria and other microorganisms, which can pose a health risk to you and those around you.
One of the most significant consequences of not cleaning your tools is the potential for rust and corrosion. When tools are not cleaned and maintained, they can become rusted and corroded, which can render them useless and costly to replace. Additionally, rust and corrosion can cause damage to the tools and make them difficult to use.
Another consequence of not cleaning your tools is the risk of contamination. Dirty tools can spread bacteria and other microorganisms, which can cause illnesses and infections. This is particularly true for tools that come into contact with food or other items that can harbor bacteria. Failure to properly clean these tools can lead to cross-contamination, which can cause foodborne illnesses and other health problems.
In conclusion, failing to properly clean your tools can have serious consequences, including damage to the tools, rust and corrosion, and the risk of contamination. By taking the time to properly clean your tools, you can ensure that they continue to function optimally and that you and those around you remain healthy.
FAQs
1. What are the benefits of properly cleaning tools?
Properly cleaning tools not only maintains their performance but also increases their lifespan. It prevents the buildup of dirt, debris, and grime that can impair the functioning of tools and equipment. Cleaning tools also reduces the risk of corrosion and damage, ensuring that they continue to work efficiently.
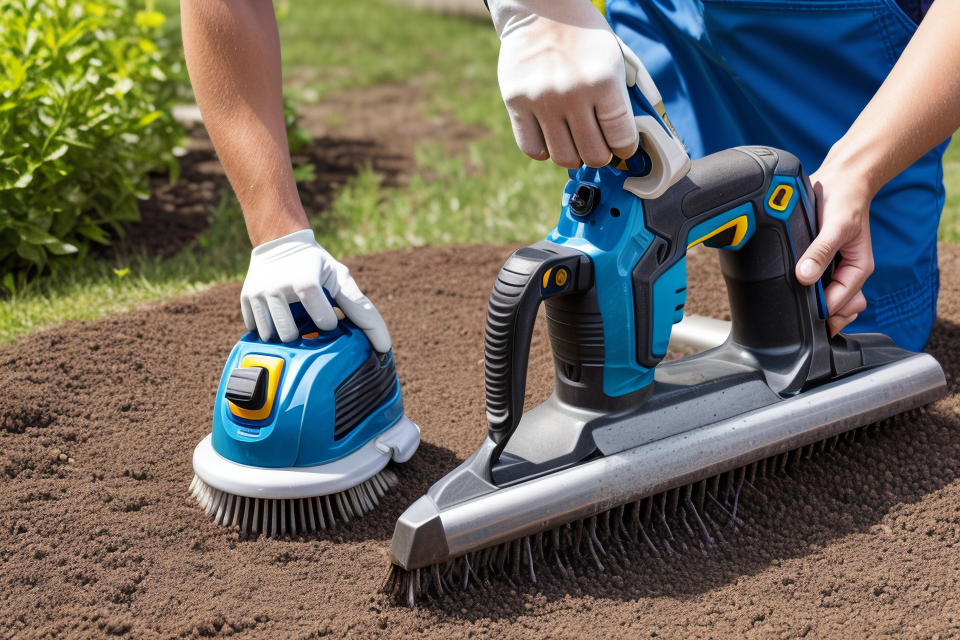
2. What are the different methods of cleaning tools?
There are several methods of cleaning tools, including manual cleaning with brushes and wipes, soaking in cleaning solutions, and using power tools with rotating brushes. The method used will depend on the type of tool and the level of cleaning required.
3. How often should I clean my tools?
The frequency of cleaning will depend on the type of tool and the level of use. As a general rule, tools that are used frequently should be cleaned more often. Tools that are used infrequently or for light tasks can be cleaned less frequently.
4. What cleaning solutions should I use?
The type of cleaning solution used will depend on the type of tool and the level of cleaning required. For example, a mild soap and water solution may be sufficient for tools that are used infrequently, while more aggressive cleaning solutions may be required for tools that are used frequently or for heavy-duty tasks.
5. Can I use harsh chemicals to clean my tools?
It is not recommended to use harsh chemicals to clean tools, as they can damage the tools and cause corrosion. Instead, use mild soap and water or specialized cleaning solutions designed for the specific type of tool.
6. Can I use power tools to clean my tools?
Yes, power tools with rotating brushes can be used to clean tools, but it is important to use caution and follow the manufacturer’s instructions to avoid damaging the tools.
7. Can I use abrasive materials to clean my tools?
No, abrasive materials should not be used to clean tools, as they can scratch or damage the surface of the tools. Instead, use soft brushes or cloths to gently remove dirt and debris.
8. How should I store my cleaned tools?
Tools should be stored in a dry, well-ventilated area, away from direct sunlight and moisture. It is also recommended to store tools in a protective case or container to prevent damage and protect them from dust and debris.


